
Composting is something Ian and I wanted to do because it's good for the environment. It reduces the amount of waste you send to the landfill and it allows the bacteria, bugs and worms to break down waste without producing harmful methane gas, as is the case in landfills. Composting also provides a very healthy soil for your garden and potted plants, which you then don't have to buy. Unfortunately, we hadn't been able to compost due to our living situations (i.e. no yard). Now, since we're staying with Dane and Micki, we temporarily have a yard and and thought we'd make it a family project.
Because composting is relatively new to all of us (Dad saves grass clippings for mulch, not compost), we used our trusty friend, google search, to find information. I even managed to find the article that originally sparked my interest in composting.
There are many variations on how to get started, but after all our research, I've come to the conclusion that as long as you follow the general guidelines for what to add and what not to add, you really can't go wrong (the difference is the speed it produces compost). Since the article had the easiest instructions, we went with that and supplemented using www.howtocompost.org. Below are the instructions taken from the article with our notes added.
1. Buy a bin studded with holes (check out Composters.com for options). Place it outside.
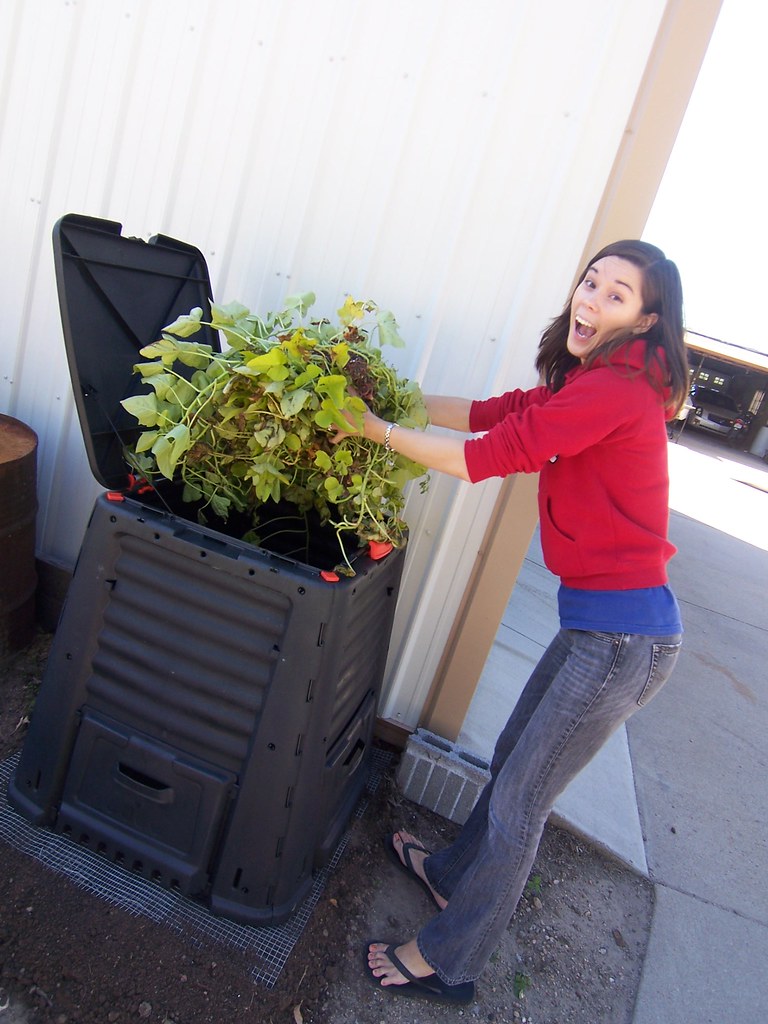
Most of the bins we found online that weren't astronomically expensive were open-bottom ones — I think that's pretty normal. We found a nice one at Lowe's for around $50. At howtocompost.org they suggested picking a spot with good sun and also turning and leveling the soil under the bin to encourage worms, etc. to move in and help the process along.
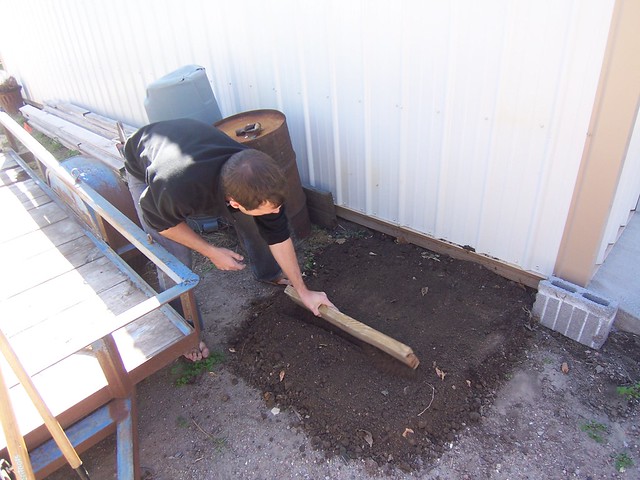
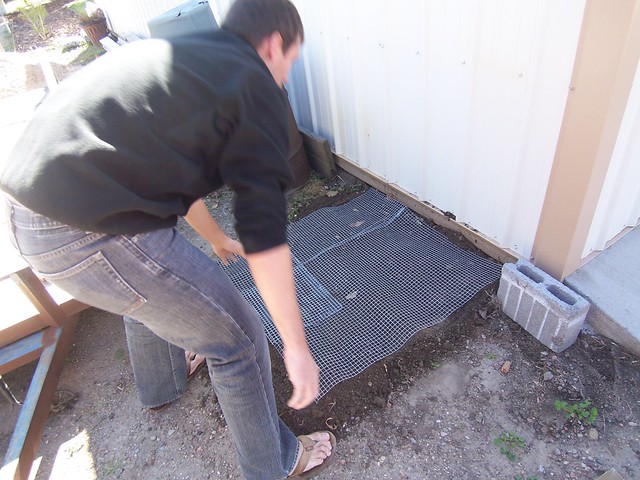
We also put down a homemade "critter guard" made out of chicken wire to help keep out animals like raccoons, since it's open on the bottom.
And because it's super windy here in western Kansas, we'll put some stakes in the corners. We just haven't gotten to that yet, since it started snowing and raining last week.
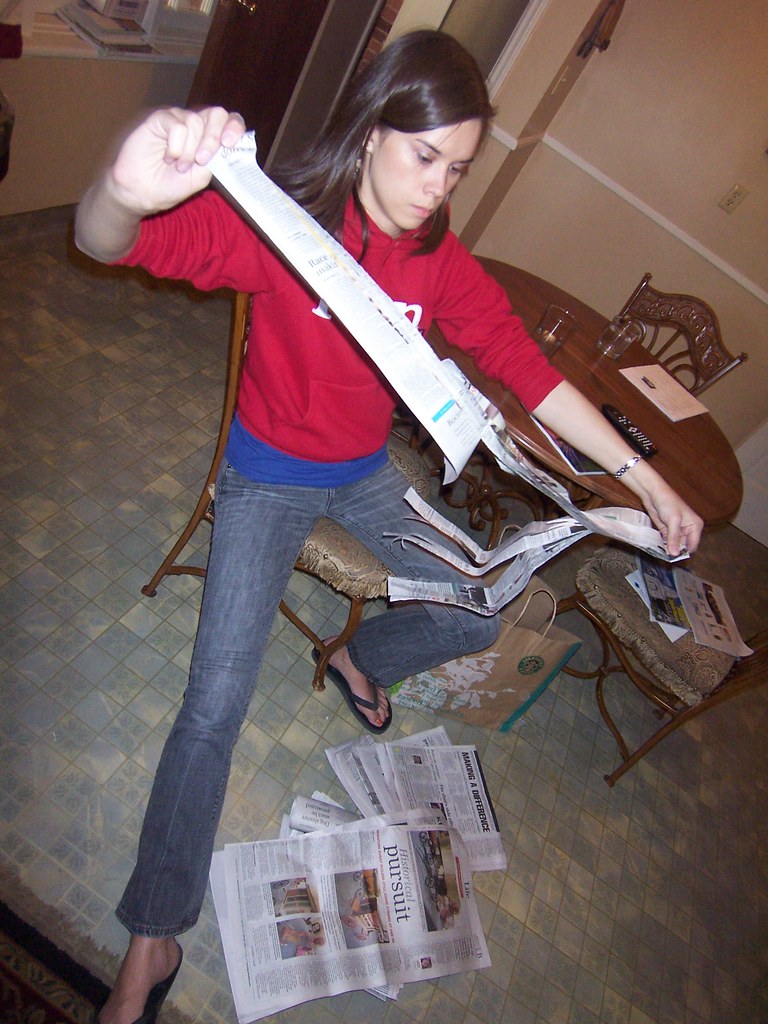
2. Fill bin 3/4 full with leaves or newspaper. Add enough water so it resembles a damp sponge.
We didn't fill the bin quite this much yet, as our bin is large and my hands got tired of ripping newspaper. We also added some plant bits, and soon we'll fill it up to the 3/4 with the newly fallen leaves. I think this level helps the heat reach the optimum composting temperature.
3. Toss in scraps (avoid meat, dairy and oil). Stir. Top with a 3-inch layer of newspaper or leaves.
- "browns" to add: leaves, hay and straw, paper and cardboard, woody prunings, eggshells, coffee grounds, tea bags, saw dust
- "greens" to add: vegetable peelings, fruit peelings, grass clippings, fresh manure, green plant cuttings, annual weeds, young hedge trimmings
- don't add because it's unsafe (poison/disease): meat, animal fat and bones, poultry and fish, human and pet feces (seriously, it's on the list at howtocompost.org... a little gross they had to put it on there), treated wood
- don't add because it will slow down the process: fatty food waste, whole eggs, dairy products, pernicious weeds
We're collecting kitchen scraps in a little trash can under the sink and dump it in the bin when it's full. We haven't had any odor or critter problems because we dump it at least once a week. You also can buy special scrap savers with lids and even odor eliminators.
5. Stir pile monthly, replacing top layer. After about six months, compost forms at bottom. Dump contents. Return scraps to bin and re-cover. Place compost at base of plants as fertilizer.
Our composting bin has handy access doors at the bottom, so theoretically, when compost forms at the bottom we can just slide up the doors and remove it, returning any scraps to the bin via the open lid on top. This also means we can check to see if the compost is ready without dumping out the whole thing — pretty handy feature!
And that's it! It takes just a little time to get started, but once you do, composting doesn't take much time at all. If you can, I highly recommend it. You'll feel great for helping the environment and your plants will thank you too. And so does Pfluff.