
First off, I state this is for people with Blogger blogs. If you use something else, I don't know how to do it. Having said that, the Blogger template I recommend when you create your own header is the Minima family (the other templates with curves and fancy lines don't seem to mesh with uploaded images, but if you can make it work, props!). Personal preference, I don't like the stretch versions as much. They stretch blog text to fit the browser window instead of using a defined, never-changing width. But it all depends on you and your blog!
Anyway, select a Minima template under the Layout tab and the Pick New Template section. If there's a color scheme you like, pick it. If not, don't worry because you can edit the colors later to match your header. (And don't forget, when you change templates, it moves your widgets around in the sidebar. After you save the new template, you'll want to move them back.)
Speaking of the header... First off, you'll want to design the image. I use Photoshop, because I'm blessed to have a husband who designs images and documents and I design in my job. However, any photo-editing program will do. (I'm not putting detailed instructions because you'll know your own program better than I do. Questions for Photoshop you can leave in the comments.) I start with a photo, add text, then tweak the photo. You will have two options when you place the image in your header, so design according to your selection. You can:
- leave it as just an image, and place it behind the blog title text. Remember that the blog header text won't look any different than it does right now (although you can edit font — limited options — and color later).
- make the text part of the image, then use the image to replace your blog title. This allows you to place the title wherever you want on the image, and use any font you'd like. That's what I've done.
Now, you might be wondering why I'm talking about a box, when there isn't a box around my header at all. I'll get to this momentarily. First, we need to get the image on your blog! In the Page Elements section under the Layout tab, you'll want to click Edit on the box that is your header. The text in this box should be your blog title. When you click Edit you'll get a pop-up window similar to this one, shown below, except instead of an image, there will be a place where you search for a file to upload.
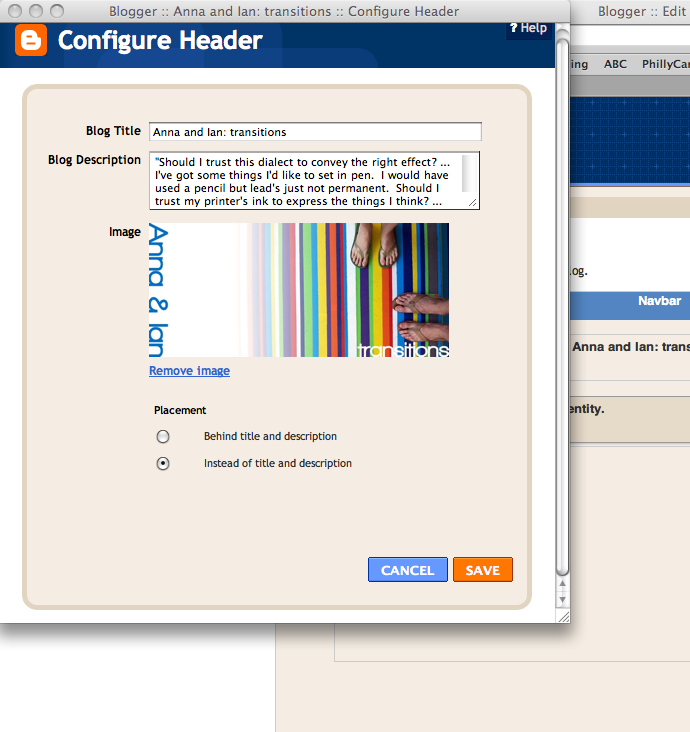
You'll click this option, find your file, then click OK. After it uploads, your image should show up where mine is in the above image. If it can't upload because the file is too big, you can reduce the resolution to 150dpi. Chances are though, size won't be a problem since your image isn't that big (per the size I specified earlier). If you're using it as a background, select the "behind title and description" option. If you are replacing the title with the image, select the "instead of title and description" option. Hit save, and you should be good to go! If you ever want to change the image, go back to this window, click Remove Image, then upload the new one. Blogger hosts these header images for this in the same spot (Picasa, via Google) as any other photos you upload using Blogger.
Now back to that outline box I was talking about earlier. All of the Minima templates have an outline around the header and dashed lines between the widgets in your sidebar. However, if you don't want these lines to show up, you can change the color of the lines to match the background, and presto, they essentially disappear. Speaking of changing your blog colors...
I mentioned earlier not to worry too much about the colors in the template you selected, because you can change all of it! In the Layout tab, you'll select the Fonts and Colors section. Note: the preview below the color-picker tool doesn't ever work for me. I make changes, save it, then view my blog. If I don't like something, I change it, save it, then look again. I recommend pulling colors similar to ones in your header. Play around with it until you find a readable combination you like. And if you want to start over, you can always cheat and use the "revert to template default" option.
Sit back and admire your beautiful blog!
I do note, there are lots of sites with free templates you can download. I elected not to do this for various reasons (which I'll share if you're curious), but it's all up to you. If you use a free template, I'd suggest a simple one (background image as opposed to huge format changes) so your blog doesn't load slowly and chase away readers. Megan uses pretty, simple and free templates, if you'd like to see an example of a good one! If you have any questions, or if my instructions are confusing or missing a crucial step, leave me a comment and I'll add/fix it!